We’re going to create dynamic app notifications. We’ll use Livewire, which is like an SPA but without all the JavaScript. Livewire works best with low latency! Luckily, Fly.io lets you deploy apps close to your users. Try it out, it takes just a minute.
I’ve never met an app that didn’t make me wish for a global notification system.
What’s that mean exactly? I always want an easy way to display notifications on any page of my application. It’s “global” because I can show it anywhere.
Livewire (and AlpineJS) gives us a way to make dynamic interfaces without writing our own javascript. This sounds like an ideal pairing for a notification system!

Let’s see how that might work.
Basic Setup
I landed on a setup that’s pretty simple. To see it in action, we’ll need to do some basic setup. Let’s create a fresh Laravel application!
We’ll use Laravel Breeze to get some basic scaffolding up. This gives us Tailwind CSS along with a pre-built layout, so we don’t need to start from zero.
Here’s how I created a new project:
# New Laravel installation
composer create-project laravel/laravel livewire-global-notifications
cd livewire-global-notifications

# Scaffold authentication with Breeze
composer require laravel/breeze --dev
php artisan breeze:install blade

# Add in Livewire
composer require livewire/livewire

# Install frontend utilities
npm install
For the database, I typically start with SQLite:
# Use sqlite, comment out the database
# name so sqlite's default is used
DB_CONNECTION=sqlite
#DB_DATABASE=laravel
Then we can run the migrations generated by Breeze. This command will ask us to create the sqlite DB file if it does not exist (yes, please!):
php artisan migrate
To run the application locally, I use the 2 commands (run in separate terminal windows):
# These are both long running processes
# Use separate tabs, tmux or similar
php artisan serve
npm run dev
Setting Up Livewire
The first thing to do when setting up Livewire is adding its styles and scripts.
After we installed Breeze, we’ll have a convenient layout file to add those. That file is resources/views/layouts/app.blade.php:
<!-- I omitted some stuff for brevity -->
  <head>
      <title>{{ config('app.name', 'Laravel') }}</title>

      <!-- Fonts -->
      <link rel="stylesheet" href="...">
+     @livewireStyles
      @vite(['resources/css/app.css', 'resources/js/app.js'])
  </head>
  <body class="font-sans antialiased">
      <div class="min-h-screen bg-gray-100">
          @include('layouts.navigation')

          <!-- Page Content -->
          <main>
              {{ $slot }}
          </main>
      </div>
+     @livewireScripts
  </body>
A Livewire Component
Let’s create a Livewire component. This component is just going to be a button. The button will dispatch an event that tells the global notification to display a notification!
Run the following to create a component:
php artisan livewire:make ClickyButton
This will generate the following files:
resources/views/livewire/clicky-button.blade.phpapp/Http/Livewire/ClickyButton.php
Let’s see the clicky-button.blade.php file first, it’s simple:
<div>
    <button
        wire:click="tellme"
        class="rounded border px-4 py-2 bg-indigo-500 text-white"
    >
        Tell me something
    </button>
</div>
Just a button! Clicking the button calls function tellme. We’ll have a corresponding function tellme in our PHP Livewire component ClickyButton.php:
<?php

namespace App\Http\Livewire;

use Livewire\Component;

class ClickyButton extends Component
{
    public function tellme()
    {
        $messages = [
            'A blessing in disguise',
            'Bite the bullet',
            'Call it a day',
            'Easy does it',
            'Make a long story short',
            'Miss the boat',
            'To get bent out of shape',
            'Birds of a feather flock together',
            "Don't cry over spilt milk",
            'Good things come',
            'Live and learn',
            'Once in a blue moon',
            'Spill the beans',
        ];


        $this->dispatchBrowserEvent(
            'notify',
            $messages[array_rand($messages)]
        );
    }

    public function render()
    {
        return view('livewire.clicky-button');
    }
}
Clicking the button tells PHP to run tellme(). The tellme() function picks a message at random and returns it. In reality you’d have a set message to use in response to a user action, but our example here is a bit contrived.
Sending Notifications
Livewire does a lot of magic where JavaScript appears to call server-side code, and visa-versa.
One neat bit of magic: We can tell PHP to fire off a client-side event! Livewire will fire that event, and regular old JavaScript can listen for it.
We did just that in our component:
$this->dispatchBrowserEvent('notify', $message);
This fires an event notify, with data $message.
Since Livewire is doing some HTTP round trips already, that event data piggybacks on the response. Livewire’s client-side code sees that the response contains and event, and dispatches it.
We can then write some JavaScript to listen for that event. We won’t use this exact thing, but this would work:
window.addEventListener('notify', event => {
    alert('The message: ' + event.detail);
})
Macros
Taking this a bit farther, Livewire supports the use of macros. It’s not directly documented, but you can source-dive to find the Component classes are macroable.
A macro lets us create a function that any Livewire component can call.
Let’s create one in app/Providers/AppServiceProvider.php. Add this to the boot() method:
use Livewire\Component;

Component::macro('notify', function ($message) {
    // $this will refer to the component class
    // not to the AppServiceProvider
    $this->dispatchBrowserEvent('notify', $message);
});
Then we can update our ClickyButton component to use that macro instead:
<?php

namespace App\Http\Livewire;

use Livewire\Component;

class ClickyButton extends Component
{
    public function tellme()
    {
        $messages = [
            // snip
        ];


        // Update this to use the macro:
        $this->notify($messages[array_rand($messages)]);
    }

    // snip
}
Using ClickyButton
The next step is adding the ClickyButton component into our application so we can click on it.
Since we used Breeze to scaffold our site, we have a convenient place to put our button. We’ll add it to the Dashboard that users see after logging in.
Edit file resources/views/dashboard.blade.php:
<x-app-layout>
    <x-slot name="header">
        <h2 class="font-semibold ...">
            {{ __('Dashboard') }}
        </h2>
    </x-slot>

    <div class="py-12">
        <div class="max-w-7xl mx-auto sm:px-6 lg:px-8">
            <div class="bg-white ...">
                <div class="p-6 ...">
                    You're logged in!
                    <br><br>
+                   <livewire:clicky-button />
                </div>
            </div>
        </div>
    </div>
</x-app-layout>
We took the Dashboard view (generated by Breeze), and added in <livewire:clicky-button />. Now when you log in, we have a button we can click!
Clicking it talks to our PHP code, which in turn fires an event. Normally clicking a button would perform some business logic first, but we’re over here in contrived-example land.
That’s great so far, but…nothing is listening to that event!

Let’s set up our application to listen to that event and display a notification.
Displaying Notifications
We need to listen for the event sent above, and then display a notification.
To accomplish that, we’ll make a component. It’s not a Livewire component! Instead, it’s a Laravel component - basically just another view file.
Let’s create file resources/views/components/notifications.blade.php, and reference it in our application template.
The application template is the very same file we added the @livewire directives into - file resources/views/layouts/app.blade.php:
<!-- I omitted some stuff for brevity -->
  <head>
      <title>{{ config('app.name', 'Laravel') }}</title>

      <!-- Fonts -->
      <link rel="stylesheet" href="...">
      @livewireStyles
      @vite(['resources/css/app.css', 'resources/js/app.js'])
  </head>
  <body class="font-sans antialiased">
      <div class="min-h-screen bg-gray-100">
          @include('layouts.navigation')

          <!-- Page Content -->
          <main>
+             <x-notifications />
              {{ $slot }}
          </main>
      </div>
      @livewireScripts
  </body>
Our notification system is now “global” - it’s on every page within the application (what users see when logged in).
We can (finally!) create our notification component in file resources/views/components/notifications.blade.php:
// full markup here:
// https://gist.github.com/fideloper/d6133aea37ce8924543a2b96058f2a86

<div
    x-data="{
        messages: [],
        remove(message) {
            this.messages.splice(this.messages.indexOf(message), 1)
        },
    }"
    @notify.window="
      let message = $event.detail;
      messages.push(message);
      setTimeout(() => { remove(message) }, 2500)
    "
    class="z-50 fixed inset-0 ..."
>
    <template
      x-for="(message, messageIndex) in messages"
      :key="messageIndex"
      hidden
      >
        <div class="...">
            <div class="...">
                <p x-text="message" class="text-sm ..."></p>
            </div>
            <div class="...">
                <button @click="remove(message)" class="...">
                    <svg>...</svg>
                </button>
            </div>
        </div>
    </template>
</div>
I omitted a bunch of things to make it more clear. Here’s the full file.
There’s a bunch of AlpineJS syntax there! Let’s explore that.
AlpineJS
A few things to point out about the above component:
- Here we’re floating the notifications on the top right of the browser (we use Tailwind CSS as Laravel Breeze sets it up for us. Also Tailwind CSS is the literal best)
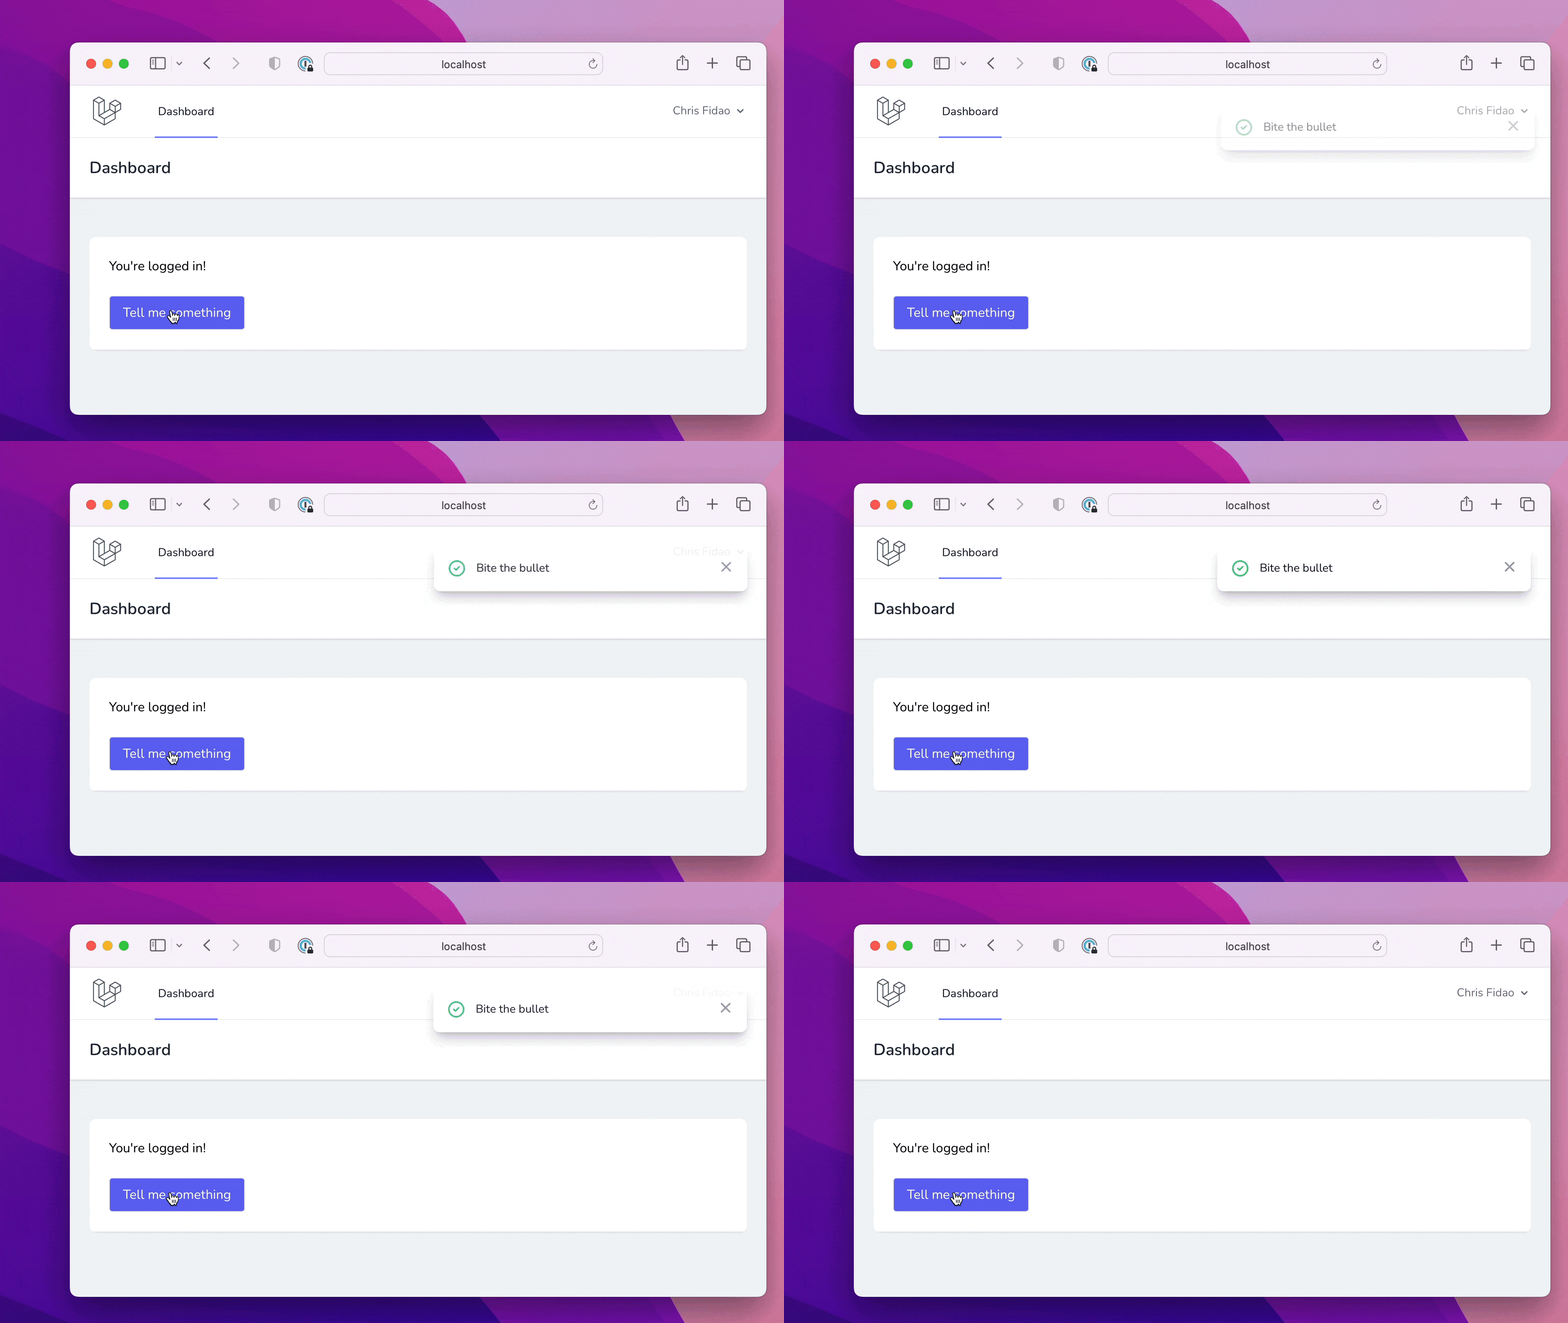
- We’re using AlpineJS to display messages, and hide them after 2.5 seconds
- Alpine has
<template>‘s andforloops. We use these to dynamically show messages
Let’s talk about the Alpine specific things!
First, x-data allows us to add properties and methods onto a DOM element. We created an array messages and a method remove().
Second, @notify.window is an event listener. It listens for event notify on the top-level object window. It is the equivalent of this:
window.addEventListener('notify', event => {...});
This is the listener for the event we fire server-side via:
$this->dispatchBrowserEvent('notify', $message);
We react to the event by adding a message to the messages array, and then set a timeout of 2.5 seconds. When that timeout elapses, we remove the message.
Third, is the <template>. As the name suggests, this lets us template some DOM elements dynamically.
In our case, we create a notification <div> for each message in the messages array. It’s reactive, so adding/removing messages updates the DOM in real-time.
Fly.io ❤️ Laravel
Fly.io is a great way to run your Laravel Livewire app close to your users. Deploy globally on Fly in minutes!
Deploy your Laravel app! →
Improving our Notifications
Our notifications work, which is great! One annoying thing is that they just pop up and then disappear in a way that’s a bit jarring. Maybe some transitions would be nice?
Alpine supports transitions, but if we try them, we’ll see they don’t work in conjunction with the reactive <template>. They just pop in and out.
Let’s see how to make them work!
First we’ll add in the transitions. This is basically straight from the Alpine docs. We use Tailwind classes to complete the effect.
- full markup here:
- https://gist.github.com/fideloper/e862beae4db2586b8a5244fc8a89255f

<template
  x-for="(message, messageIndex) in messages"
  :key="messageIndex"
  hidden
  >
  <div
+   x-transition:enter="transform ease-out duration-300 transition"
+   x-transition:enter-start="translate-y-2 opacity-0 sm:translate-y-0 sm:translate-x-2"
+   x-transition:enter-end="translate-y-0 opacity-100 sm:translate-x-0"
+   x-transition:leave="transition ease-in duration-100"
+   x-transition:leave-start="opacity-100"
+   x-transition:leave-end="opacity-0"
    class="..."
  >
    <div class="...">
      <div class="...">
        <p x-text="message" class="text-sm ..."></p>
      </div>
      <div class="...">
        <button @click="remove(message)" class="...">
          <svg>...</svg>
        </button>
      </div>
    </div>
  </div>
</template>
As mentioned, this doesn’t (yet) work due to how Alpine is showing/hiding the message elements. See the full markup here.
$nextTick
To get the “enter” transitions to work, we need to delay showing notifications until they exist as DOM elements. We can do using $nextTick!
From the docs:
$nextTick is a magic property that allows you to only execute a given expression AFTER Alpine has made its reactive DOM updates.
This is a tricky way to get Alpine to delay applying the transition until after the message <div> element has been created.
- full markup here:
- https://gist.github.com/fideloper/542608f327ee30043aeb35f0b04ab60f

<template
  x-for="(message, messageIndex) in messages"
  :key="messageIndex"
  hidden
  >
  <div
+   x-data="{ show: false }"
+   x-init="$nextTick(() => { show = true })"
+   x-show="show"
    x-transition:enter="transform ease-out duration-300 transition"
    x-transition:enter-start="translate-y-2 opacity-0 sm:translate-y-0 sm:translate-x-2"
    x-transition:enter-end="translate-y-0 opacity-100 sm:translate-x-0"
    x-transition:leave="transition ease-in duration-100"
    x-transition:leave-start="opacity-100"
    x-transition:leave-end="opacity-0"
    class="..."
  >
    <div class="...">
      <div class="...">
        <p x-text="message" class="text-sm ..."></p>
      </div>
      <div class="...">
        <button @click="remove(message)" class="...">
          <svg>...</svg>
        </button>
      </div>
    </div>
  </div>
</template>
We added a property show and only show the element when show=true. Then $nextTick() sets that to true after the element exists. This allows the transition to work. See the full markup here.
However, this trick only works for the “enter” transition! The “leave” transition is not run, as we completely remove the element once that timeout of 2.5 seconds has elapsed.
Leave Transition
We need more trickery, and it’s kinda-sorta the inverse of the trick above.
The goal is to give each message <div> element time to transition out by setting show=false before truly deleting the DOM element.
Let’s see the solution!
- full markup here:
- https://gist.github.com/fideloper/aee47e08569c23aba2a80157735d7053

<div
  x-data="{
    messages: [],
-   remove(message) {
+   remove(mid) {
-     this.messages.splice(this.messages.indexOf(message), 1)
+     $dispatch('close-me', {id: mid})
+
+     let m = this.messages.filter((m) => { return m.id == mid })
+     if (m.length) {
+       setTimeout(() => {
+         this.messages.splice(this.messages.indexOf(m[0]), 1)
+       }, 2000)
+     }
    },
  }"
- @notify.window="
-   let message = $event.detail;
-   messages.push(message);
-   setTimeout(() => { remove(message) }, 2500)
- "
+ @notify.window="
+   let mid = Date.now();
+   messages.push({id: mid, msg: $event.detail});
+   setTimeout(() => { remove(mid) }, 2500)
+ "
  class="z-50 ..."
>
  <template
    x-for="(message, messageIndex) in messages"
    :key="messageIndex"
    hidden
  >
    <div
-     x-data="{ show: false }"
+     x-data="{ id: message.id, show: false }"
      x-init="$nextTick(() => { show = true })"
      x-show="show"
+     @close-me.window="if ($event.detail.id == id) {show=false}"
      x-transition:enter="..."
      x-transition:enter-start="..."
      x-transition:enter-end="..."
      x-transition:leave="..."
      x-transition:leave-start="..."
      x-transition:leave-end="..."
      class="max-w-sm ..."
    >
      <div class="rounded-lg ...">
        <div class="p-4">
          <div class="flex items-start">
            <div class="...">
-             <p x-text="message" class="..."></p>
+             <p x-text="message.msg" class="..."></p>
            </div>
            <div class="...">
-             <button @click="remove(message)" class="...">
+             <button @click="remove(message.id)" class="...">
              </button>
            </div>
              </div>
          </div>
        </div>
      </div>
  </template>
</div>
Two big changes here!
- The
messagesarray now holds objects in format{id: Int, msg: String} - We dispatch and listen for a new event
close-me, which uses the newidproperty to close a specific message
See the full markup here.
The main “thing” here is the close-me event. When our 2.5 second timeout elapses, we call remove() and pass it a generated message ID. The ID is just a timestamp, with milliseconds.
The remove() method dispatches the close-me event. Each message is listening for that event. If it detects that its ID matches the ID in the event, then it sets show=false, which kicks off the hide transition.
The remove() method also searches for the specific message by the ID. If it finds it, it sets another timeout to actually delete the message (vs just hiding it) after another 2 seconds. This ensures the message has transitioned out before sending it on its way to garbage collection.
We also have some minor changes to deal with the fact that each message is an object rather than a string. We need to reference message.msg and message.id where appropriate.
We did it!

We did it! Livewire with a sprinkle of AlpineJS is really magical. In fact, you may have noticed we didn’t explicitly add Alpine. It’s just there for us via Livewire.
The “hard” part wasn’t even setting up a notification system. Instead it was trying to make a bunch of fancy transitions! Livewire and Alpine made the hard part easy.
- We were able to easily send client-side events from the server-side
- We used Alpine to show messages based on a user action
- We spent a bunch of superfluous time making the transitions look nice
You can see the whole project here.
The way Livewire lets us “Do JavaScript™” without actually writing much JavaScript at all is amazing.
