
Fly takes a Docker image, converts it to a VM, and runs that VM anywhere around the world. Run a Laravel app in minutes!
Users are not equal.
You heard me. Some users are above others. They are allowed to do more than other users. They can see things other users cannot see. Sometimes they can even remove lower-class users!
Now, this is not a weirdly abstract horror movie script, nor is it a manifesto to rally the common users into guillotining the higher classes. It’s simply the way apps are built, and there’s really not much wrong with it. We’re going to be doing the exact same today, actually. And by “we’re doing” I mean that I’ll show you how to do it, and you just sit back, grab a cup of coffee or tea, and read on. Let’s go!
The Goal
We’ll set up an app where users can have 3 levels: Administrator, Contributor and Member. For that, we’ll use the newly introduced Enum class that came with PHP 8.1. After that we’ll set up some routes to edit user levels and delete other users, and finally we’ll use policies to divide our users into ‘cans’ and ‘cannots’.
Here are the steps in more detail:
- Create a Users page where users are listed
- Add a level to our User model
- Make it possible to edit User levels
- Use the User level to allow or deny access to functionality using a Policy
- Make it possible to delete Users
Along the way, we’ll learn about PHP’s new Enums, model casting and authorization using Laravel’s policies.
I’ve created a github repo to go alongside this blog post with a pull request for each section. That way you can see what code gets edited for each section. Now let’s begin, shall we?
Displaying the Users
Let’s jump in. To begin, create a new Laravel project and install Breeze. If you need help with this, check out Laravel Bootcamp.
We’re going to add a ‘users’ page where all users are listed. We’ll use that page as a base and we’ll bolt on additional functionality later on. Here’s what our users page will look like:
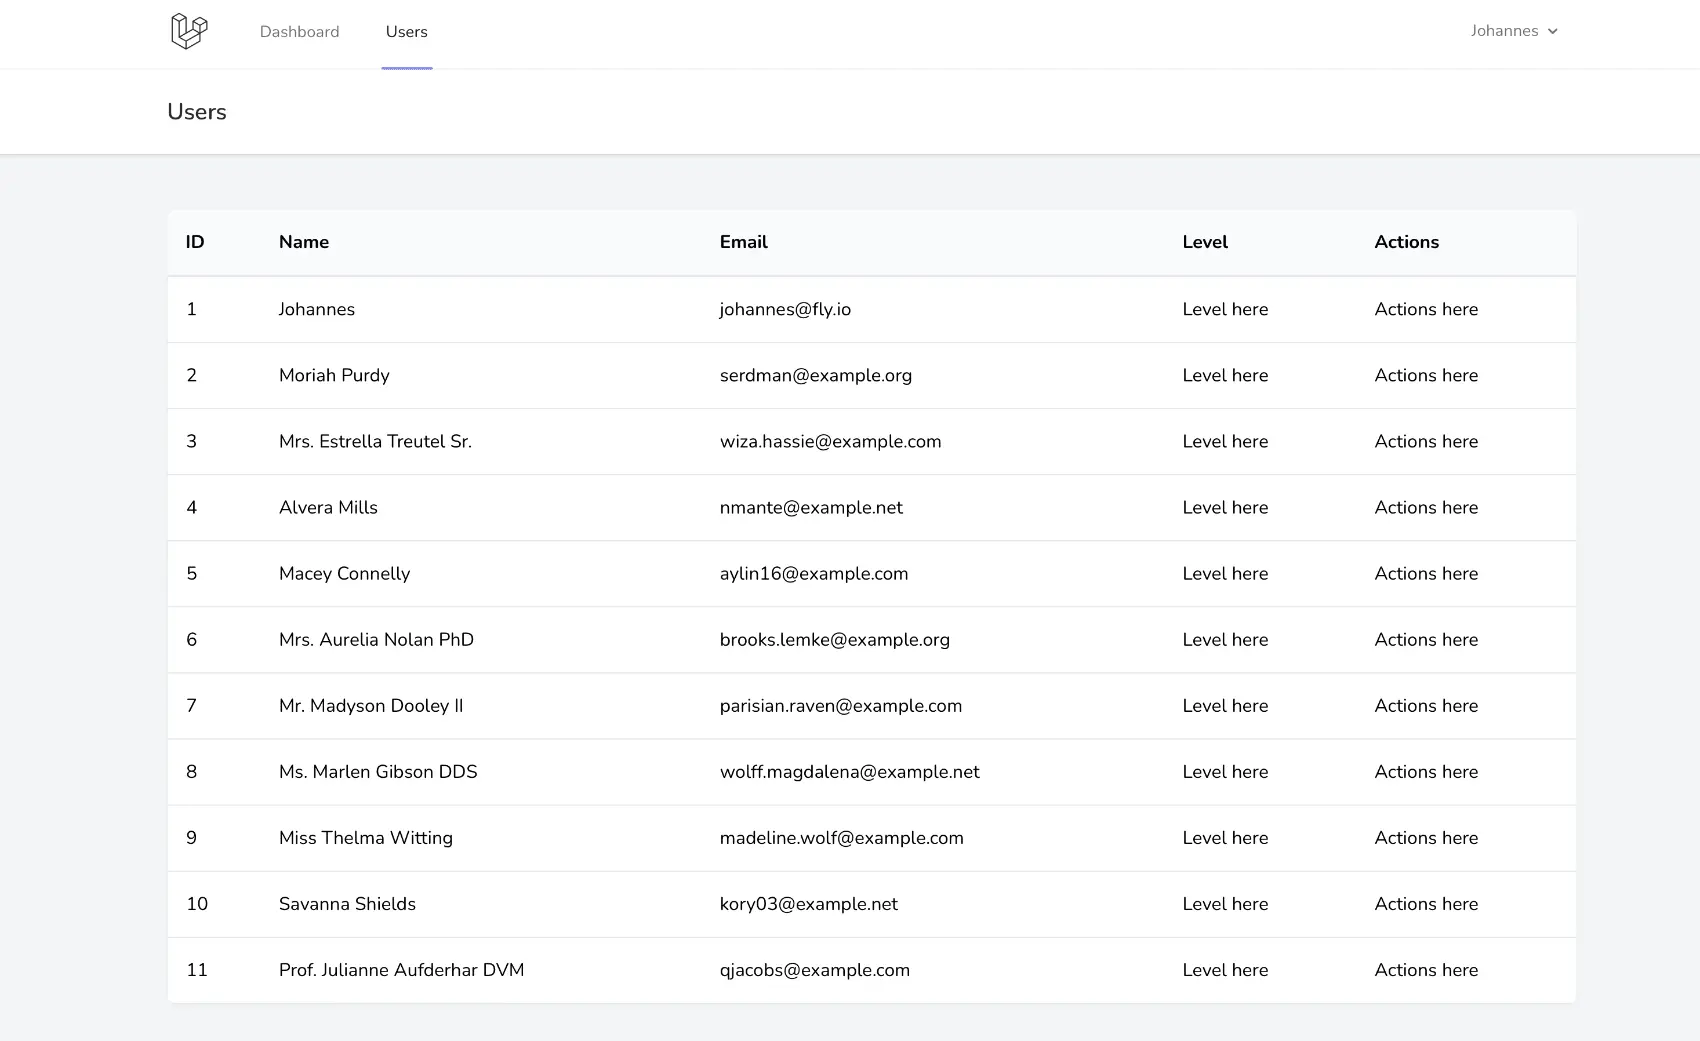
For this, we’ll need to set up a route with a get request, and have that route connect to a controller that will return the ‘users’ view. We’ll also give our route a name (users.index sounds good) and add the ‘auth’ middleware to enforce users that are not logged in can’t access this page. We’ll end up adding something like this in web.php:
// ... other routes here ...

+ Route::get('/users', [UserController::class, 'index'])
+     ->middleware(['auth'])
+     ->name('users.index');
Now, we referenced a UserController but that doesn’t exist yet, as I’m sure your IDE has yelled at you already. Create the controller with php artisan make:controller UserController and create a method ‘index’ that returns the view ‘users.index’. It’ll look like this:
  class UserController extends Controller
  {
+     public function index()
+     {
+         return view('users.index');
+     }
  }
Also, don’t forget to import the UserController in web.php:
  use App\Http\Controllers\ProfileController;
+ use App\Http\Controllers\UserController;
  use Illuminate\Support\Facades\Route;
Lastly, let’s add the final puzzle piece: the view. Create a ‘users’ folder in resources/views and in there, add an index.blade.php file. We’ll copy over the contents from the dashboard.blade.php file, and change the displayed text and the title:
{{--resources/views/users/index.blade.php--}}
<x-app-layout>
    <x-slot name="header">
        <h2 class="font-semibold text-xl text-gray-800 leading-tight">
            {{ __('Users') }}
        </h2>
    </x-slot>

    <div class="py-12">
        <div class="max-w-7xl mx-auto sm:px-6 lg:px-8">
            <div class="bg-white overflow-hidden shadow-sm sm:rounded-lg">
                <div class="p-6 text-gray-900">
                    {{ __("Users overview coming here!") }}
                </div>
            </div>
        </div>
    </div>
</x-app-layout>
Now, let’s try it out! Run the migrations, register an account and click the link to the users page… If you can’t find it, it’s because we haven’t added it yet! Open up views/layouts/navigation.blade.php and let’s take care of that right away:
...
  <!-- Navigation Links -->
  <div class="hidden space-x-8 sm:-my-px sm:ml-10 sm:flex">
      <x-nav-link :href="route('dashboard')" :active="request()->routeIs('dashboard')">
          {{ __('Dashboard') }}
      </x-nav-link>
+     <x-nav-link :href="route('users.index')" :active="request()->routeIs('users.index')">
+         {{ __('Users') }}
+     </x-nav-link>
  </div>

...

<!-- Responsive Navigation Menu -->
    <div :class="{'block': open, 'hidden': ! open}" class="hidden sm:hidden">
        <div class="pt-2 pb-3 space-y-1">
            <x-responsive-nav-link :href="route('dashboard')" :active="request()->routeIs('dashboard')">
                {{ __('Dashboard') }}
            </x-responsive-nav-link>
+           <x-responsive-nav-link :href="route('users.index')" :active="request()->routeIs('users.index')">
+               {{ __('Users') }}
+           </x-responsive-nav-link>
        </div>
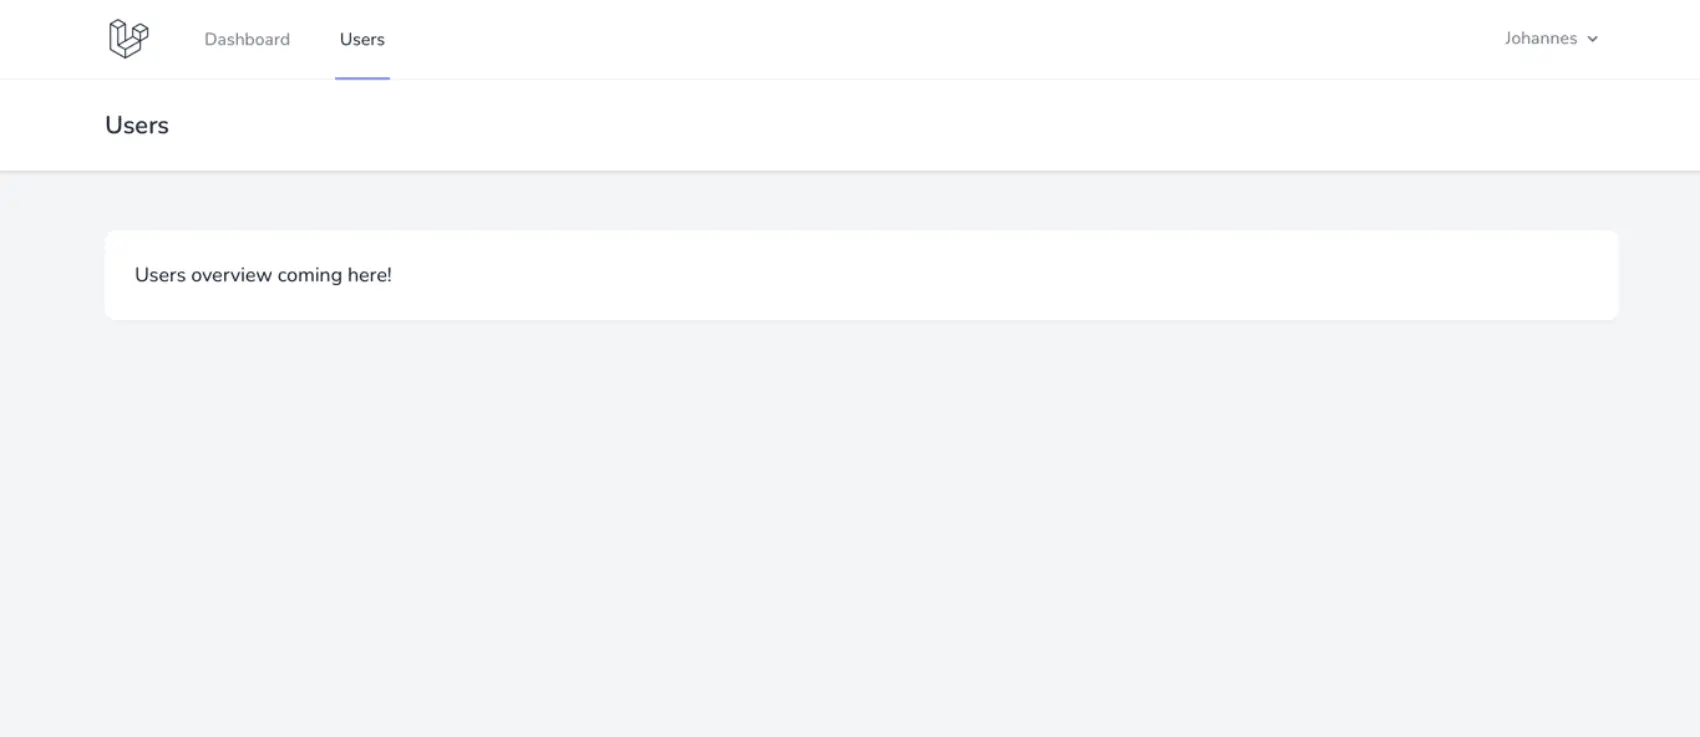
Reload the page, and now we should be able to verify our users view is working. It should look like this:
Let’s make it look pretty real quick. in users/index.blade.php:
<div class="py-12">
        <div class="max-w-7xl mx-auto sm:px-6 lg:px-8">
            <div class="bg-white overflow-hidden shadow-sm sm:rounded-lg">
-             <div class="p-6 text-gray-900">
-                   {{ __("Users overview coming here!") }}
-               </div>
+             <table class="w-full table-auto">
+                   <thead class="font-bold bg-gray-50 border-b-2">
+                   <tr>
+                       <td class="p-4">{{__('ID')}}</td>
+                       <td class="p-4">{{__('Name')}}</td>
+                       <td class="p-4">{{__('Email')}}</td>
+                       <td class="p-4">{{__('Level')}}</td>
+                       <td class="p-4">{{__('Actions')}}</td>
+                   </tr>
+                   </thead>
+                   <tbody>
+                       <tr class="border">
+                           <td class="p-4">1</td>
+                           <td class="p-4">Name here</td>
+                            <td class="p-4">Email here</td>
+                           <td class="p-4">Level here</td>
+                           <td class="p-4">Actions here</td>
+                       </tr>
+                   </tbody>
+               </table>
            </div>
        </div>
    </div>
Now, the page should show a table:
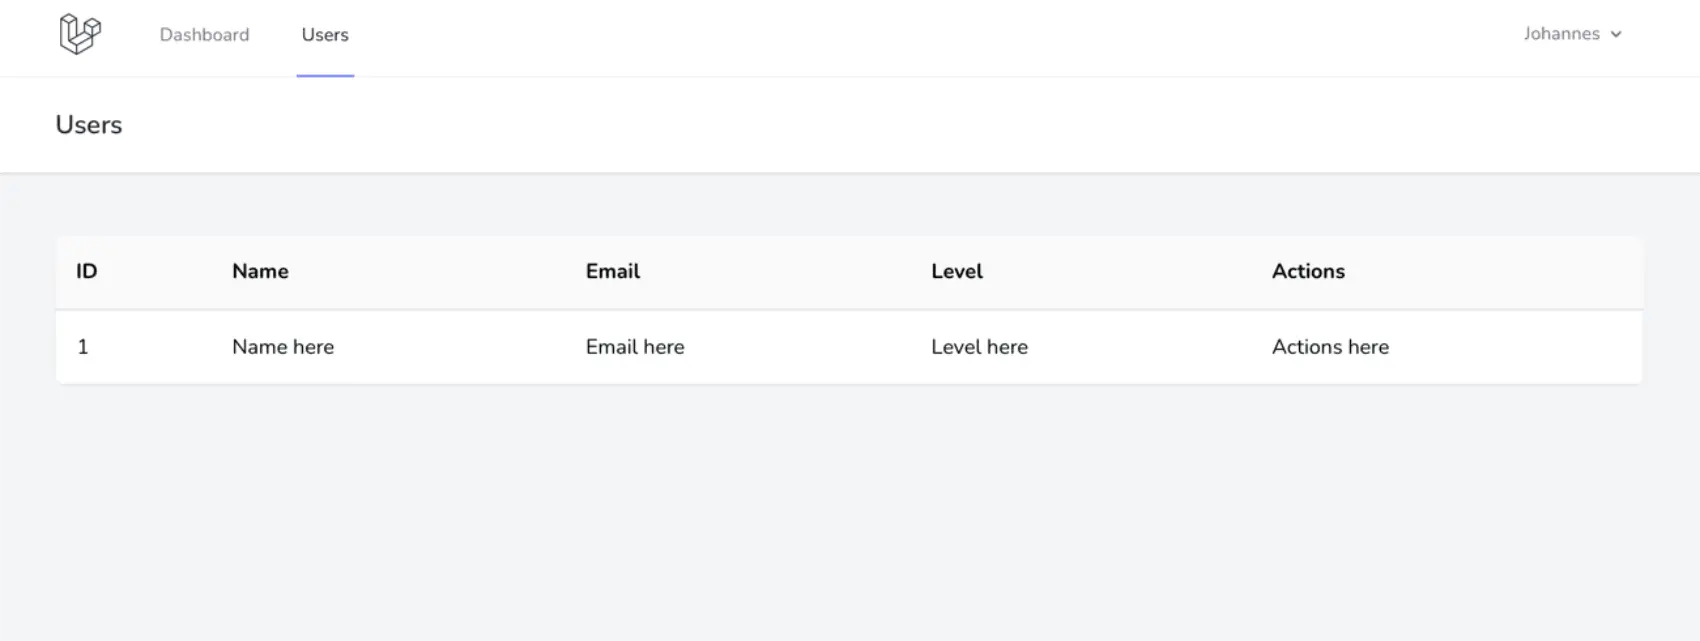
Looks better, doesn’t it? All that’s left for us to do now is to show our actual users in the table. First let’s adapt our view so it can use an array of users to display each user in a row in the table:
<tbody>
+ @foreach($users as $user)
  <tr class="border">
-     <td class="p-4">1</td>
-     <td class="p-4">Name here</td>
-     <td class="p-4">Email here</td>
+     <td class="p-4">{{$user->id}}</td>
+     <td class="p-4">{{$user->name}}</td>
+     <td class="p-4">{{$user->email}}</td>
      <td class="p-4">Level here</td>
      <td class="p-4">Actions here</td>
  </tr>
+ @endforeach
</tbody>
This makes the next issue obvious: The user level is not defined on the User model yet. We will be adding it in soon, but first we need to pass along the users to the view. For that, open up the UserController and add:
+ use App\Models\User;
use Illuminate\Http\Request;

class UserController extends Controller
{
    public function index()
    {
-       return view('users.index');
+       return view('users.index')->with('users', User::getAllUsers());
    }
}
See how the model is the class responsible for retrieving the data instead of the controller? This complies with the ‘skinny controllers, fat models’ paradigm, which is generally viewed as a best practice. Here’s how the getAllUsers method in the User model looks:
public static function getAllUsers()
{
    return User::all(); // should use pagination, but ok for now
}
If we reload our page, normally you’ll see your user displayed in the table. Let’s add some test users for good measure. We could use a database seeder for this, but that’s like killing a fly with a bazooka. Fun, maybe, but very much overkill. Tinker is much more appropriate here:
php artisan tinker // use 'sail artisan tinker' if you're using sail!

User::factory()->count(10)->create() // create 10 users using UserFactory
Okay, now that we’ve got some decent testing data, we can move over to the next step: adding the User Level.
Leveling up the Users
Next let’s look at how we can expand the User model to add levels to it. These will be defined ahead of time and will have limited options. Freely translated: the perfect breeding ground for an enum! More specifically a BackedEnum. These have been added since PHP 8.1 so make sure your php version supports enums! Create a new app/Enums directory and add the following in the UserLevel.php file:
<?php

namespace App\Enums;

enum UserLevel: int
{
    case Member = 0;
    case Contributor = 1;
    case Administrator = 2;
}
In this case, we have 3 different levels: Member, Contributor and Administrator. These correspond to an integer, which is why it’s called a Backed Enum. This way, we can use the human-readable name for each value when we’re coding but only the integer value will be saved into the database. Neat!
Now, let’s pop the hood of our User Model and tack on the user level. In app/Models/User:
+ use App\Enums\UserLevel;

  ...

  protected $fillable = [
      'name',
      'email',
      'password',
+     'level',
    ];

...

  protected $casts = [
      'email_verified_at' => 'datetime',
+     'level' => UserLevel::class,
  ];
By adding the level attribute to the casts array, we inform Laravel that we want the integer from the database to be cast to the enum with all its functionality. If we didn’t add it, our level attribute would be an integer on our Model.
There are many days when I would continue coding on other features or jump into the frontend stuff, and completely forget to add the migration. Today is not that day.
Create the migration with php artisan make:migration add_level_to_users and add the following:
/**
     * Run the migrations.
     *
     * @return void
     */
    public function up()
    {
        Schema::table('users', function(Blueprint $table) {
+           $table->integer('level')->default(0);
        });
    }

    /**
     * Reverse the migrations.
     *
     * @return void
     */
    public function down()
    {
        Schema::table('users', function(Blueprint $table) {
+           $table->dropColumn('level');
        });
    }
We’ve added a column in the users table, with an integer data type. The default value is 0, but there’s no easy way to know what actual level that corresponds to… But that’s exactly why we’re using enums, so let’s change that line:
+ use App\Enums\UserLevel;

...

public function up()
{
  Schema::table('users', function (Blueprint $table) {
-   $table->integer('level')->default(0);
+   $table->integer('level')->default(UserLevel::Member->value);
  });
}
This way, the integer value of our Member level can change without breaking the functionality; users will still be Members by default. Don’t forget to run the php artisan migrate or sail artisan migrate now!
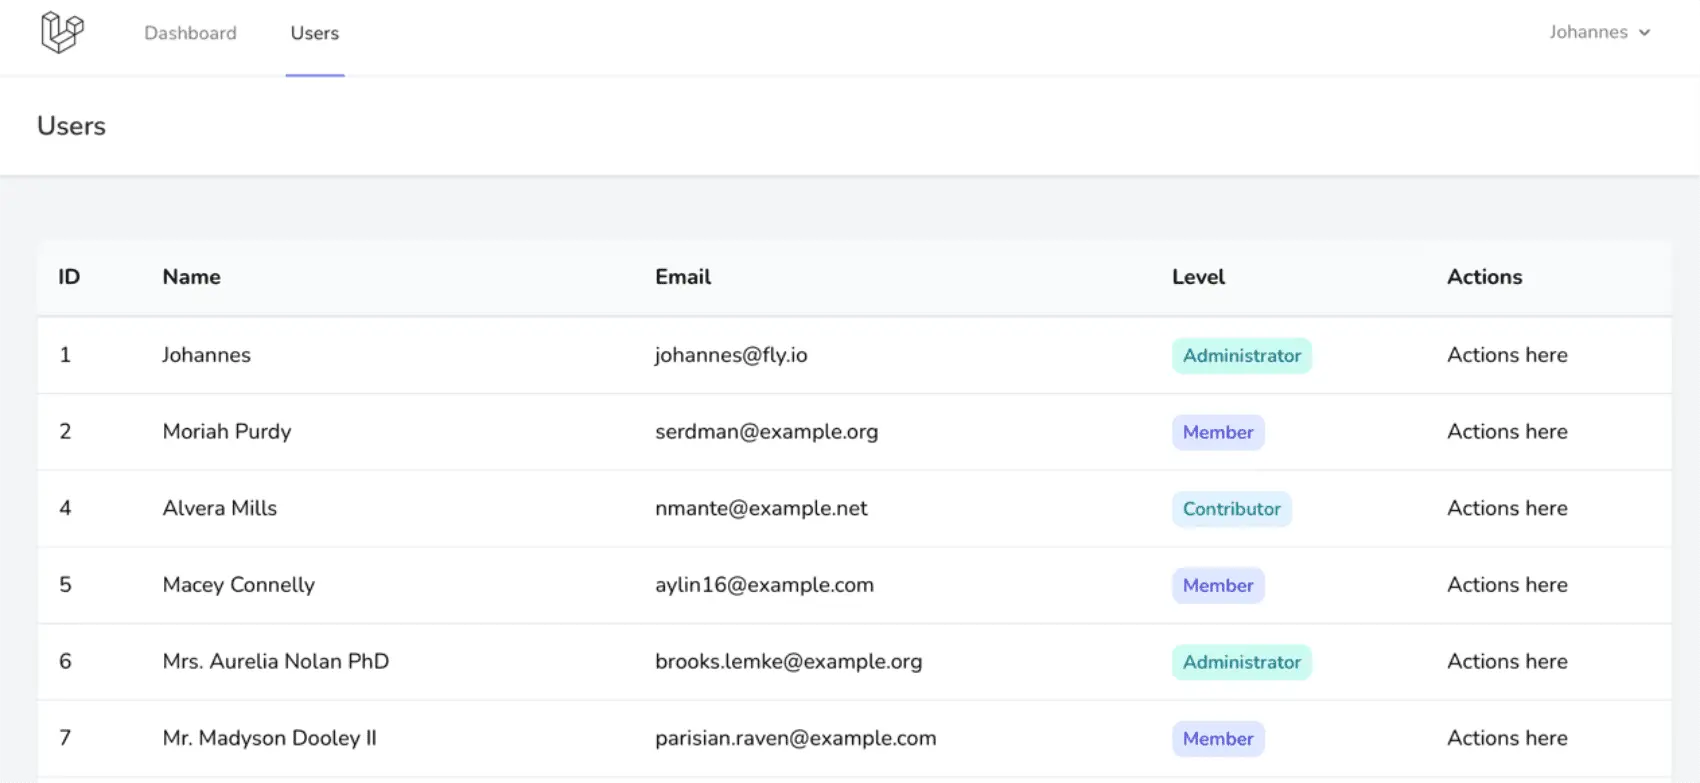
Last but not least, let’s update our view to reflect the correct user level. I’ve jazzed it up and made it into a badge for no good reason actually. In views/users/index.blade.php:
+ @php use App\Enums\UserLevel; @endphp

- <td class="p-4">Level here</td>
+ <td class="p-4">
+   <span @class([
+           'px-2 py-1 font-semibold text-sm rounded-lg',
+           'text-indigo-700 bg-indigo-100' => UserLevel::Member === $user->level,
+           'text-sky-700 bg-sky-100' => UserLevel::Contributor === $user->level,
+           'text-teal-700 bg-teal-100' => UserLevel::Administrator === $user->level,
+           ])>
+     {{__($user->level->name)}}
+   </span>
+ </td>
Don’t forget to import the UserLevel class again!
One possible change for better readability would be to have methods on the user model that checks each user level, like isAdmin(), isContributor() and isMember(). You can add those whenever you want 😉.
Here’s another small challenge for you: To check that everything looks good, we’ll need users with different levels. Using Tinker, make your own user an Administrator, and add 3 new Contributors. This might be a great moment to refresh your knowledge on Eloquent Factories . When you have at least one user for all 3 user levels, you can see my colorful badges in action 💅. Here’s how they look:
Editing the Users
Alright, every user has a level now. What if we wanted to promote a user by bumping them up a level? Right now we’ve been using Tinker but that’s really more a local testing tool. We could add an edit page with a dropdown in our users view where the user level can be edited. Let’s set that up quickly by making a new controller, adding a create and an edit route, and creating a new view. Let’s begin with the controller:
php artisan make:controller UserLevelController
You might be surprised to see a new UserLevelController instead of reusing the UserController. I do this to make everything ‘Cruddy by design’. If you have no clue what I’m talking about, check out Adam Wathan’s talk at Laracon 2017.
Now, open up our new controller and add the following methods:
public function edit(User $user)
{
  return view('userlevels.edit')->with('user', $user);
}

public function update(Request $request, User $user)
{
  $validated = $request->validate([
      'level' => ['required', new Enum(UserLevel::class)]
      ]);

  $user->level = $validated['level'];
  $user->save();

  return redirect(route('users.index'));
}
The new Enum(UserLevel::class) validation rule will check that level can be cast to an instance of UserLevel. For more info, check out the Laravel docs on validation
Also, make sure that the app\Enums\UserLevel and the Illuminate\Validation\Rules\Enum are imported correctly or your IDE will complain and more importantly, the code won’t work.
Now, let’s add our routes in web.php:
// ! don't forget to import the UserLevelController !
Route::get('/users/{user}/edit', [UserLevelController::class, 'edit'])
    ->middleware(['auth'])
    ->name('userlevels.edit');

Route::put('/users/{user}', [UserLevelController::class, 'update'])
    ->middleware(['auth'])
    ->name('userlevels.update');
Lastly, let’s add our view. It’s fairly simple: We display the user’s name, and add a select input to pick the correct user level. Create a new userlevels directory in resources/views and add an edit.blade.php file with the following content:
@php use App\Enums\UserLevel; @endphp
<x-app-layout>
    <x-slot name="header">
        <h2 class="font-semibold text-xl text-gray-800 leading-tight">
            {{ __('Change User Level') }}
        </h2>
    </x-slot>

    <div class="py-12">
        <div class="max-w-7xl mx-auto sm:px-6 lg:px-8 space-y-6">
            <div class="p-4 sm:p-8 bg-white shadow sm:rounded-lg">
                <div class="max-w-xl">
                    <header>
                        <h2 class="text-lg font-medium text-gray-900">
                            {{ $user->name }}
                        </h2>

                        <p class="mt-1 text-sm text-gray-600">
                            {{ __("Update the user level of $user->name.") }}
                        </p>
                    </header>

                    <form method="post" action="{{ route('userlevels.update', $user) }}" class="mt-6 space-y-6">
                        @csrf
                        @method('put')

                        <div>
                            <x-input-label for="level" :value="__('User Level')"/>

                            <select name="level" id="level"
                                    class="w-full rounded-md shadow-sm border-gray-300 focus:border-indigo-300 focus:ring focus:ring-indigo-200 focus:ring-opacity-50">
                                @foreach(UserLevel::cases() as $levelOption)
                                    <option value="{{$levelOption}}" @if ($levelOption == $user->level) selected="selected" @endif>
                                        {{$levelOption->name}}
                                    </option>
                                @endforeach
                            </select>

                            <x-input-error :messages="$errors->get('level')" class="mt-2"/>
                        </div>

                        <div class="flex items-center gap-4">
                            <x-primary-button>{{ __('Save') }}</x-primary-button>
                        </div>
                    </form>
                </div>
            </div>

        </div>
    </div>
</x-app-layout>
Let’s try it out! Go to the users overview and… Well we’d better add a way to access our new routes, eh? It’ll be a small change in users/index.blade.php:
- <td class="p-4">Actions here</td>
+ <td class="p-4">
+     <a href="{{route('userlevels.edit', $user)}}" class="px-4 py-2 bg-gray-800 rounded-md font-semibold text-xs text-white uppercase tracking-widest">Edit</a>
+ </td>
Fly.io ❤️ Laravel
Fly.io is a great way to run your Laravel Livewire app close to your users. Deploy globally on Fly in minutes!
Deploy your Laravel app! →
Protecting the Users
Right now, every user can change the user level of every other user. That’s not exactly what we want, is it?
We only want some users to be able to change the user level of another user. And as luck might have it we’ve already divided up our users in 3 categories: Administrators, Contributors and Members. So let’s say only Administrators can change user levels.
For that we’ll need a Policy: Run php artisan make:policy UserPolicy to make one. We’ll use Controller Helpers to validate our edit and update methods, like this in UserLevelController:
public function edit(User $user)
    {
+       $this->authorize('updateLevel', $user);
        return view('userlevels.edit')->with('user', $user);
    }

    public function update(Request $request, User $user)
    {
+       $this->authorize('updateLevel', $user);

        $validated = $request->validate([
            'level' => ['required', new Enum(UserLevel::class)]
            ]);

        $user->level = $validated['level'];
        $user->save();

        return redirect(route('users.index'));
    }
So, how does this work? The $this->authorize checks if the logged in User has permission to updateLevel the $user .
Behind the scenes, Laravel will look for a Policy that can be used for the $user Model. It will look in the app/Policies and app/Models/Policies folders if it can find a Policy with the correct name: [name of Model] + Policy.php . In our case that will be UserPolicy, which is exactly what we chose. This means that Laravel will automatically link our UserPolicy to actions we want to do with the User model.
In the UserPolicy, Laravel will run the updateLevel method with two parameters: the logged in User and the Model that user is trying to change. In our case this will be another User. If true is returned in the method then the action is allowed, else it will be forbidden. Let’s quickly test out our updateLevel method, add the following in UserPolicy:
/**
 * @param User $loggedInUser the user that's trying to update the level of $model
 * @param User $model the user whose level is being updated by the $loggedInUser
 * @return bool
 */
public function updateLevel(User $loggedInUser, User $model)
{
  return false;
}
Right now, no-one is allowed to change the user level of any user. If you try it out on the app you’d see a 403 Unauthorized message. That’s great, we know our policy is working! Now, let’s update the method so only Administrators can update the user levels:
public function updateLevel(User $loggedInUser, User $model)
{
- return false;
+ // don't forget to import the UserLevel enum!
+ return UserLevel::Administrator == $loggedInUser->level;
}
Alright, looking good! Well err, not that good actually: When a user is not allowed to change user levels, the ‘edit level’ button is still shown. That’s not really user-friendly, showing them buttons they aren’t allowed to click. We can easily fix that, like this in users/index.blade.php:
<td class="p-4">
+ @can('updateLevel', $user)
  <a href="{{route('userlevels.edit', $user)}}" class="px-4 py-2 bg-gray-800 rounded-md font-semibold text-xs text-white uppercase tracking-widest">Edit</a>
+ @endcan
</td>
This will only show the button if the logged in user is allowed to click it. Much better.
There is one small issue left to fix. As a seriously kick-ass developer you’ve already thought of everything and have picked up on this issue already, but I’ll still repeat it here: If the only administrator removes his administrator title, no one will be able to change the user levels ever again… Let’s update that in the UserPolicy as well!
public function updateLevel(User $loggedInUser, User $model)
{
  // don't forget to import the UserLevel enum!
- return UserLevel::Administrator == $loggedInUser->level;
+ if (UserLevel::Administrator == $loggedInUser->level)
+ {
+   // when deleting an Admin, check if there will be admins left
+   if (UserLevel::Administrator == $model->level) return User::getNumberOfAdmins() > 1;
+   else return true;
+ }
+ else return false;
}
We’re using a new method in the User model that doesn’t exist yet: getNumberOfAdmins. Here’s how it looks:
// Add this in the User model:
public static function getNumberOfAdmins()
{
  // using ->count() is a much quicker database operation than using ->get() and counting in PHP.
  return User::where('level', UserLevel::Administrator)->count();
}
There. Now, when an admin is logged in they can edit the user level of everyone, with one exception: they can’t edit their own level if they are the only admin. Looks good!
Destroying the Users
Now that’s a brutal headline. Destroy them! Destroy them A L L!
Anyway…
I’m going to leave this one up to you. The goal here is almost exactly the same as the level editing, with one difference: non-administrators can delete themselves. You might be surprised how easy it is. Good luck!
I made a separate pull request with all the delete functionality for your convenience, you can find it right here.
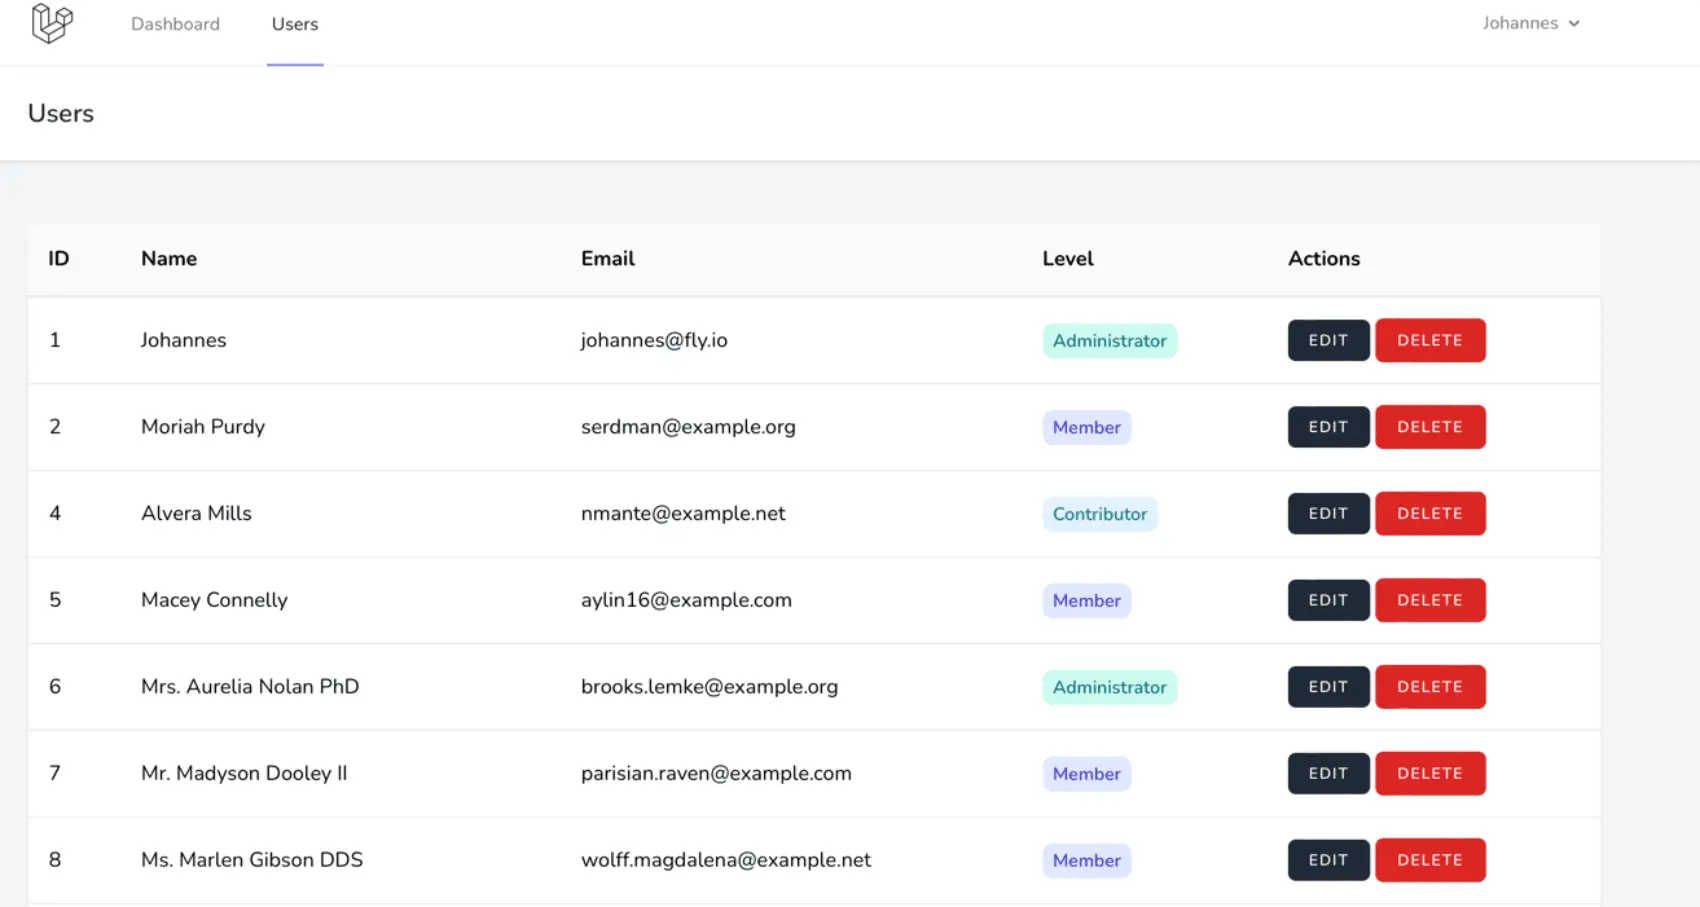
Here’s what the finished result should look like:
There we go, a detailed dive into Policies and how they can be used. We also explored some PHP 8.1 functionality: enums! I really do like them, since they make code much more readable.
As always, thanks for reading!
Johannes
